Oven & Microwave Maintenance
Oven & Microwave Maintenance is a crucial part of keeping your kitchen appliances working their best. At Techniconnect Blog, we specialize in providing solutions for the maintenance and repair of a wide range of home appliances and gadgets. Our dedicated team is here to help you with any issues you may face, whether it’s everyday wear and tear, software glitches, or hardware problems. We offer comprehensive solutions tailored to your needs, ensuring optimal functionality and longevity for your oven and microwave. With our expertise, you can keep your kitchen running smoothly and enjoy delicious meals for years to come.
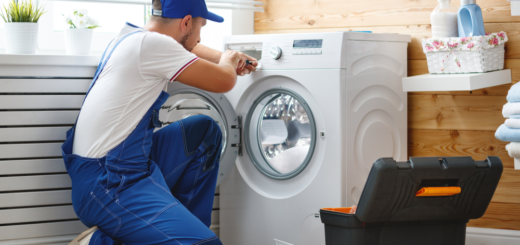
Oven maintenance
Oven maintenance is important to ensure that your oven functions properly and lasts for a long time. By regularly cleaning and checking the different components of your oven, you can keep it in optimal condition. In this article, we will discuss several aspects of oven maintenance, including cleaning the oven, checking the heating elements, calibrating the temperature, replacing the oven light, cleaning the oven door, cleaning the oven racks, cleaning the drip pans, cleaning the control panel, and inspecting the power cord and plug.

This image is property of www.yourhomesolutions.com.
Cleaning the oven
Cleaning the oven is an essential part of oven maintenance. Over time, food residue and spills can accumulate inside the oven, which can affect its performance and even cause unpleasant odors. To clean the oven, start by removing any food residue or debris from the oven interior. You can use a damp cloth or sponge to wipe away any loose particles. For stubborn food residue, you can use an oven cleaner. Make sure to follow the instructions on the cleaner and wear protective gloves.
In addition to cleaning the oven interior, don’t forget to clean the oven knobs and the oven window. The oven knobs can accumulate dirt and grease, so it’s important to wipe them clean regularly. The oven window can become dirty with splatters and stains, making it difficult to see inside the oven. Use a glass cleaner and a non-abrasive cloth to clean the oven window.
Checking the heating elements
The heating elements in your oven are responsible for generating heat to cook your food. It’s important to regularly check the heating elements to ensure that they are functioning properly. Start by inspecting the bake element, which is located at the bottom of the oven. Look for any signs of damage, such as cracks or breaks. If you notice any damage, it’s important to replace the bake element.
Next, inspect the broil element, which is located at the top of the oven. Check for any signs of damage and replace the broil element if necessary. Faulty heating elements can affect the temperature and cooking performance of your oven. Replacing them will help maintain the effectiveness of your oven.

This image is property of res.cloudinary.com.
Calibrating the temperature
To ensure that your oven cooks at the correct temperature, it’s important to calibrate the temperature settings. Start by testing the oven temperature using an oven thermometer. Preheat the oven to a specific temperature and then place the oven thermometer inside. Allow the oven to stabilize at that temperature and then check the reading on the thermometer.
If the oven temperature does not match the set temperature, you may need to adjust the temperature calibration. Refer to your oven’s user manual for instructions on how to calibrate the temperature settings. Follow the instructions carefully to ensure accurate temperature control in your oven.
Replacing the oven light
If the light in your oven has burned out, it’s important to replace it. Start by identifying the type of oven light that your oven uses. Refer to your oven’s user manual for information on the type of light bulb to use. Once you have the new oven light bulb, make sure the oven is turned off and cool before proceeding.
To replace the oven light, you will need to remove the old light bulb. Depending on your oven model, you may need to unscrew the light cover or release a latch to access the bulb. Carefully remove the old bulb and replace it with the new one. Make sure the new bulb is securely in place before closing the light cover or latch.

This image is property of www.completehomewarranty.com.
Cleaning the oven door
The oven door can become dirty over time, with grease and food stains accumulating on the door glass and door gasket. To clean the oven door, start by removing the oven door. Check your oven’s user manual for instructions on how to remove the door safely.
Once the door is removed, you can clean the door glass by using a glass cleaner and a non-abrasive cloth. Wipe away any grease or stains, and make sure to clean both the inner and outer sides of the glass. For the door gasket, use a damp cloth to wipe away any dirt or debris. Be cautious not to damage the gasket while cleaning.
After cleaning the door glass and gasket, you can reinstall the oven door following the instructions in your oven’s user manual. Make sure the door is securely in place before using the oven again.
Cleaning the oven racks
The oven racks can become dirty with food residue and grease. To clean the oven racks, start by removing them from the oven. Place the racks in a sink or bathtub and fill it with warm water and a small amount of dish soap. Let the racks soak for a few hours to soften any baked-on stains.
After soaking, use a sponge or non-abrasive cloth to wipe away the food residue and grease from the racks. Rinse the racks thoroughly with clean water and dry them before reinserting them into the oven.

This image is property of p.calameoassets.com.
Cleaning the drip pans
The drip pans, also known as oven liners or oven trays, are located beneath the heating elements in your oven. They catch any food or liquid that may drip or spill during cooking. Over time, these drip pans can become dirty and stained. To clean the drip pans, start by removing them from the oven.
Fill a sink or basin with warm water and a small amount of detergent. Place the drip pans in the soapy water and let them soak for a few minutes. Use a sponge or non-abrasive cloth to scrub away any food residue or stains. For stubborn stains, you can use a mixture of baking soda and water to create a paste. Apply the paste to the stains and let it sit for a few minutes before scrubbing.
Rinse the drip pans thoroughly with clean water and dry them before reinstalling them into the oven.
Cleaning the control panel
The control panel of your oven can accumulate dirt, grease, and stains over time. To clean the control panel, start by turning off the power to the oven. This will ensure your safety while cleaning.
Use a damp cloth to wipe away any dirt or debris from the control panel. If there are stubborn stains, you can use a mild detergent or a mixture of vinegar and water to clean the control panel. Take care not to let any liquid seep into the control panel, as it can cause electrical damage.

This image is property of appliancerepairmedic.com.
Cleaning the ventilation system
The ventilation system in your oven helps to remove excess heat, steam, and odors during cooking. It’s important to keep the ventilation system clean to ensure proper airflow and prevent any blockages.
To clean the ventilation system, start by removing the vent cover. Use a damp cloth or sponge to wipe away any dirt or debris from the vent cover. You can also use a vacuum cleaner with a brush attachment to remove any dust or lint.
Next, clean the vent duct by using a flexible brush or a long-handled cleaning tool. Insert the brush or tool into the vent duct and gently scrub away any dirt or debris. Make sure to clean both the inside and outside of the vent duct.
After cleaning, reinstall the vent cover and make sure it is securely in place.
Inspecting the power cord and plug
The power cord and plug of your oven should be inspected regularly for any signs of damage. Start by checking the power cord for frayed or damaged wires. If you notice any damage, it’s important to replace the power cord to avoid any electrical hazards.
Next, inspect the plug for loose connections or damage. Make sure the plug fits securely into the power outlet and that there are no exposed wires or bent prongs. If the plug is damaged, it’s important to replace it with a new one.
Regularly inspecting the power cord and plug will help ensure the safety and proper functioning of your oven.
In conclusion, oven maintenance involves several tasks such as cleaning the oven, checking the heating elements, calibrating the temperature, replacing the oven light, cleaning the oven door, cleaning the oven racks, cleaning the drip pans, cleaning the control panel, and inspecting the power cord and plug. By regularly performing these maintenance tasks, you can ensure that your oven operates efficiently and lasts for a long time. Remember to follow the instructions in your oven’s user manual and take appropriate safety precautions while performing maintenance tasks.